Setting up the Orbiter 2016 SDK in Visual Studio 2019
Orbiter is to space flight, what X-Plane is to aviation. Orbiter has been around since the early 2000s and it seems like some of the documentation for add-on development is a bit out-dated. This post documents how to get an Orbiter 2016 addon development environment set-up on Windows 10, using tools available today (in 2020).
Download Orbiter 2016
Download and install Orbiter following instructions at http://orbit.medphys.ucl.ac.uk/download.html. “TexFilms” on Youtube has a very good video detailing how to install Orbiter 2016 along with some essential add-ons. Orbiter-Forum is also a great resource. The rest of the post assumes that Orbiter 2016 is installed in C:\Orbiter.
Download Visual Studio 2019
Download the Visual Studio 2019 Community Edition web installer from Visual Studio Download Center. Run the installer and you will eventually see a window with something similar to this:
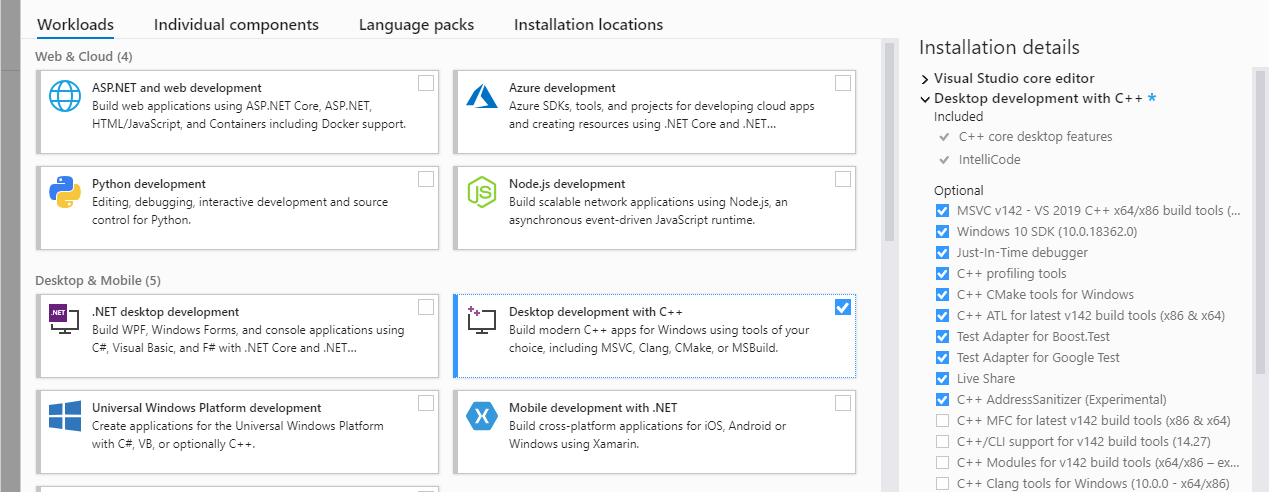
Check the option that says “Desktop Development with C++”. You may also modify the install location for the compiler. Continue with the installation and wait for it to complete.
Build a sample project
The Orbiter SDK is installed in C:\Orbiter\OrbiterSdk. The SDK includes some sample projects including custom vehicles and Multi-Functional Displays (MFDs). Open OrbiterSdk\CustomMFD\CustomMFD.vcproj in Visual Studio 2019. You will get a prompt asking you if you want to convert the project to make it compatible.
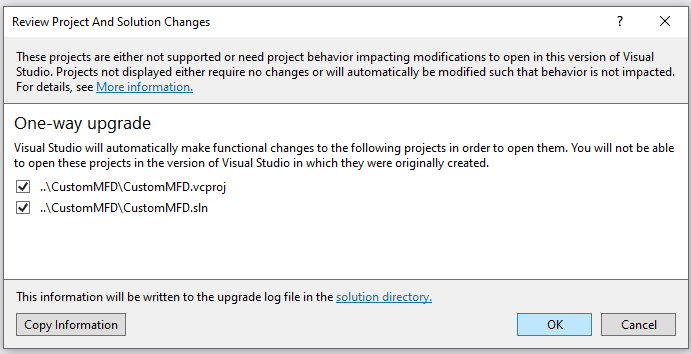
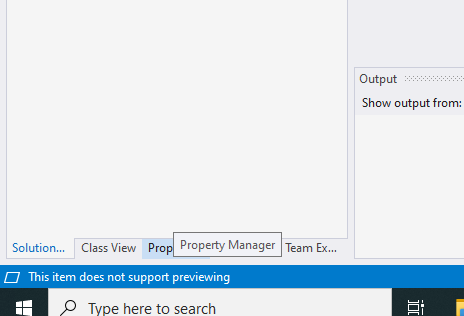
Click “OK” to continue. Switch to the “Property Manager” tab at the bottom of “Solution Explorer”.
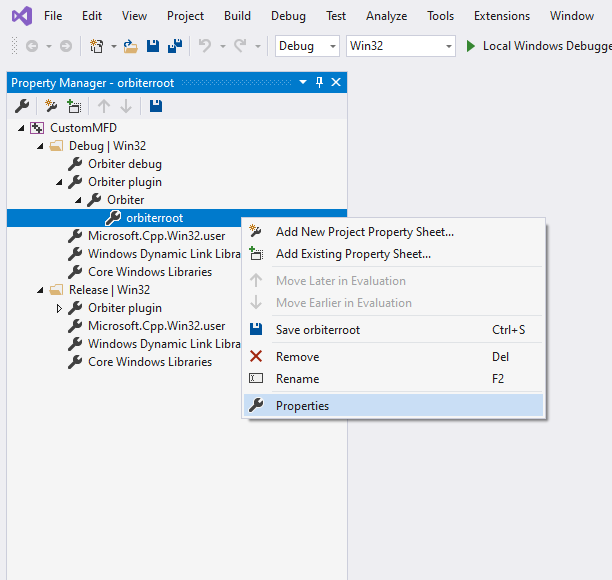
Within Property Manager, expand “CustomMFD” to show two options “Debug | WIn32” and “Release | Win32”. Expand both of these until you get an opton called “Orbiterroot”. Right click this and select Properties.
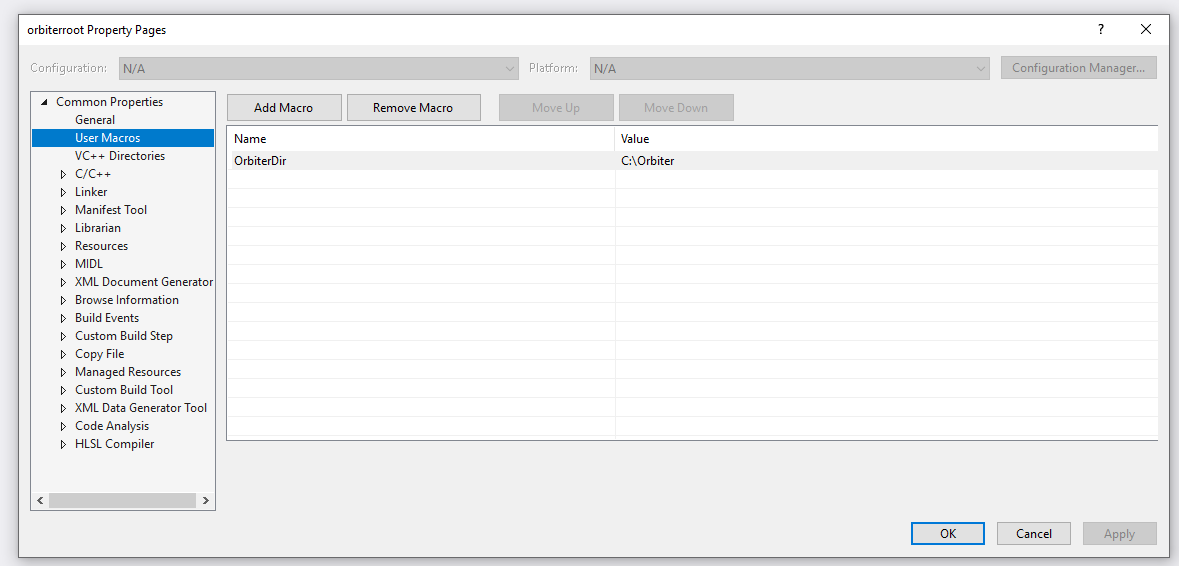
Select “User Macros”. Ensure that the “OrbiterDir” variable is set to the correct Orbiter installation path.
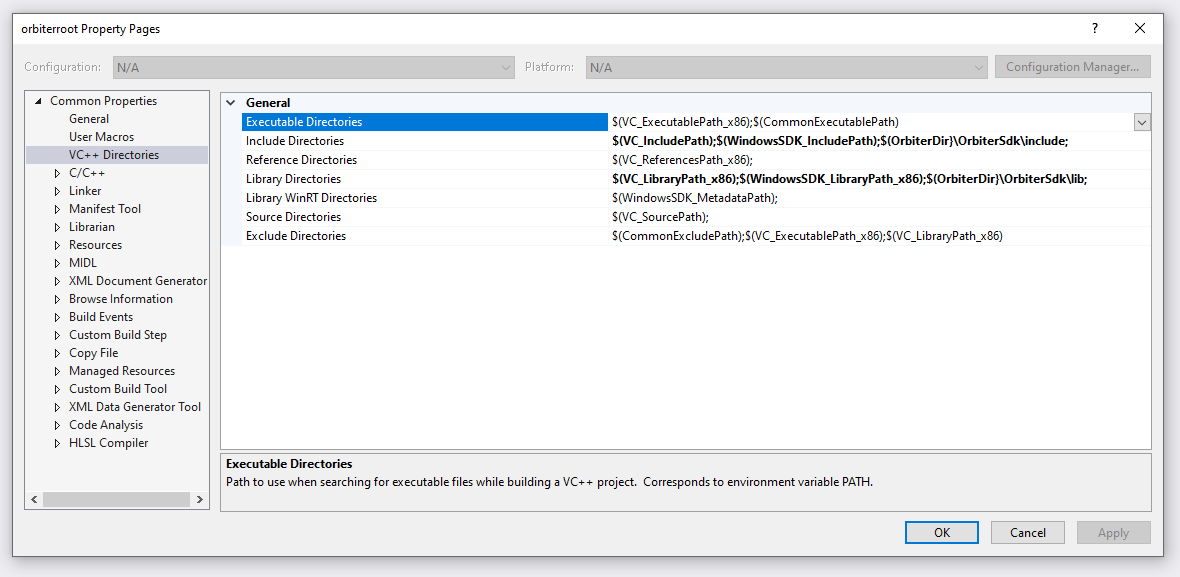
Select “VC++ Directories”. Change the “Include Directories” and “Library Directories” settings as shown in the screenshow below. This will ensure that the compiler can find the Orbiter SDK header files and libraries.
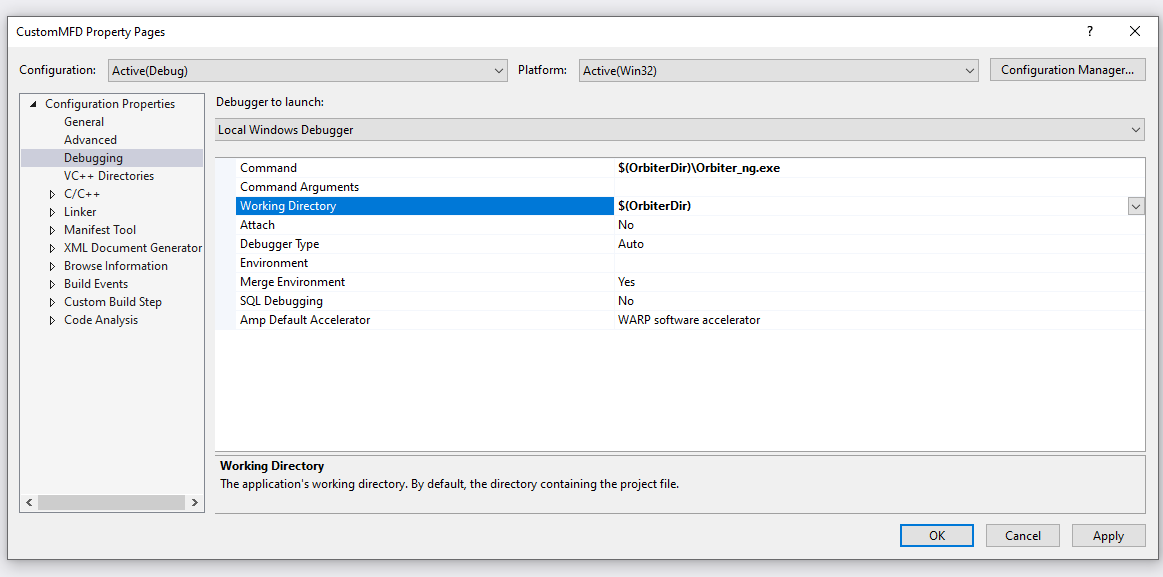
Click “OK” to close the property pages window. Right click on “CustomMFD” in Property Manager and select “Properties”. This should give you a window with an additional setting called “Debugging”. Change the settings as shown in the screenshot below. Please note that I use C:\Orbiter\Orbiter_ng.exe as the “Command” setting because I have the Orbiter D3D9Client installed. If you are running a vanilla Orbiter installation, set this to C:\Orbiter\Orbiter.exe instead.
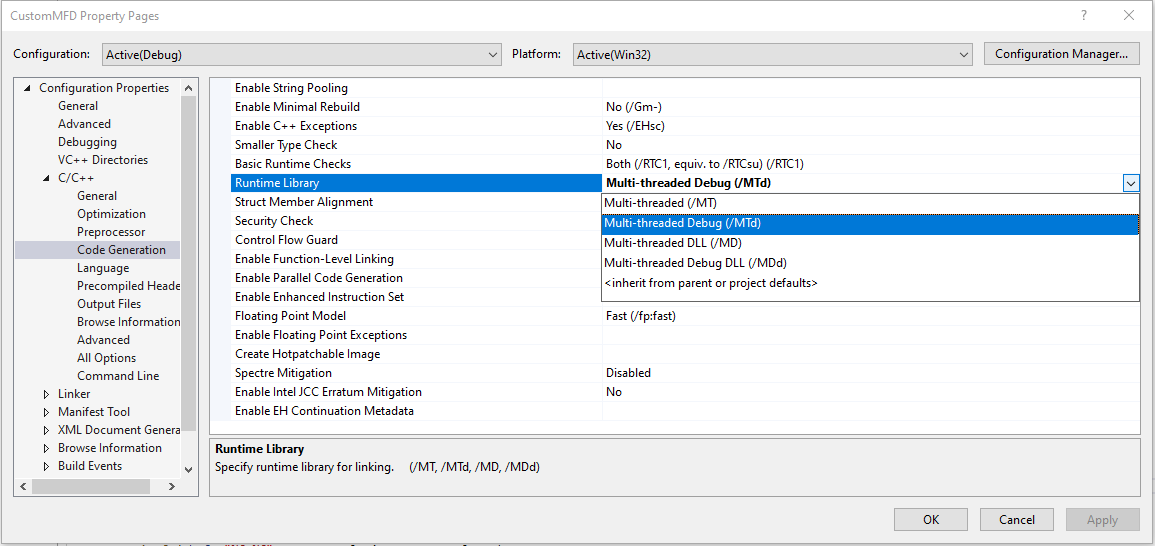
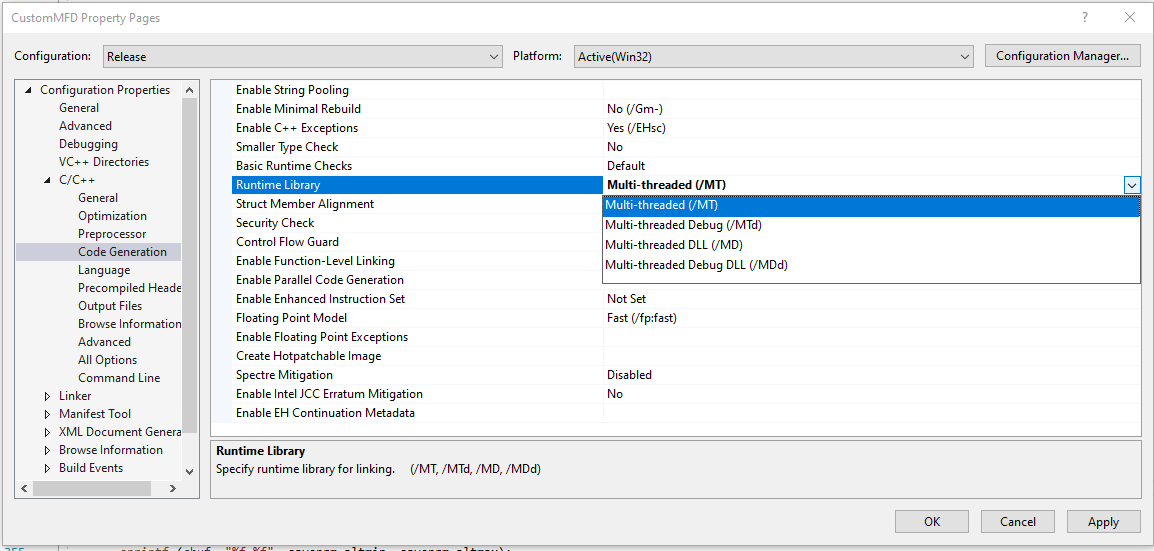
I got this handy tip from Andrew Stokes’ video. Go to C++ > Code Generation in the Property Sheet. Change Runtime Library to “Multithreaded (/MT)” for your “Release” configuration and “Multithreaded Debug (/MTd)” for your “Debug” configuration. This removes an external dependency on Visual Studio Runtime DLL.
At this point, if you hit Build (F7), you may get an error saying:
RC : fatal error RC1110: could not open CustomMFD.rc
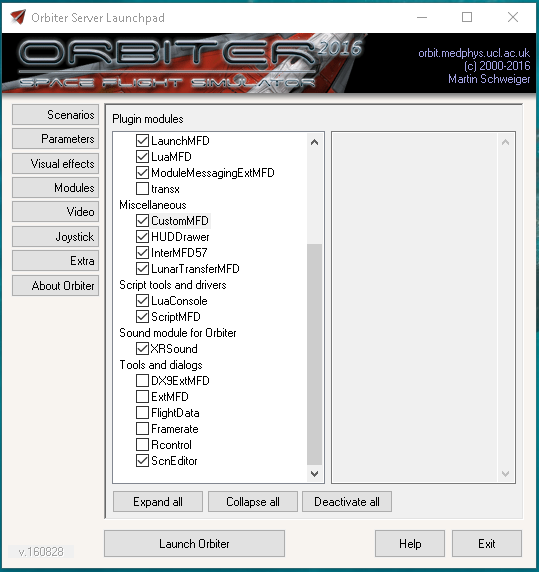
If this happens, switch back to “Solution Explorer” and delete the CustomMFD.rc file. Now the project should build successfully. It should be noted that the compiler places the output in the C:\Orbiter\Modules\Plugin directory by default. This can be verified by deleting C:\Orbiter\Modules\Plugin\CustomMFD.dll and rebuilding the project. Ensure that CustomMFD.dll appears in the folder after you build the project. You can now run Orbiter as usual or have Visual Studio start it for you by hitting “Debug”. Activate the Module within Orbiter Launcher as shown below to test it in the simulator.
Your development environment is now ready.